Schedules
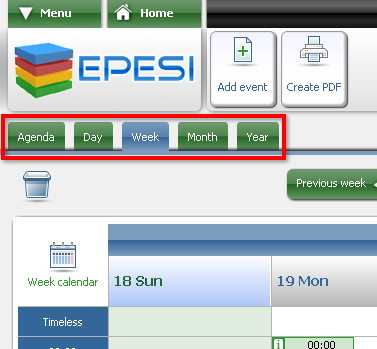
The calendar can display events in a list with Agenda view, or in a grid with Day, Week, Month, and Year view. You can switch between them by clicking on the respective tabs while using the module.
Agenda
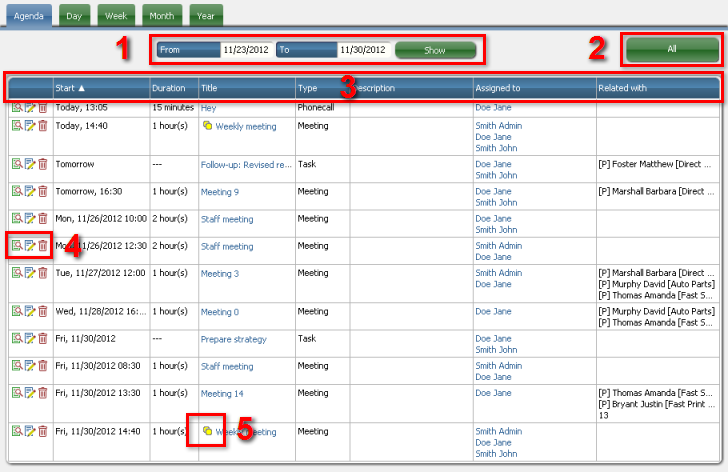
Agenda puts events in a list, one under another. It gives you the possibility to view events in a few useful orders, for example chronologically.
-
This panel determines time range for which events are displayed. You can set this range by determining From and To dates. To do this click on either "From" or "To" field and select the date. After that click "Show" button and the right events will be displayed.
-
This button serves as a filter for event types. Clicking it will let you choose whether to display Meetings, Task and Phonecalls.
-
This bar, apart from obvious informational usage, serves as the sorting tool. All fields here, except "Actions", work as sorting buttons. When you click them, you choose the value by which the events are sorted and also toggle ascending/descending order.
-
These buttons serve as shortcuts to the common actions you might want to perform on the events.
-
This icon indicates, that the event is repeatable. Such an event can occur with one of the few different frequencies, for instance once a week on Monday.
Grid Views
Day View, Week View and Month View display events by showing them on time grids. Day View and Week View are focusing on showing the starting dates, duration and overlapping of events. Month View is more general and displays events on the right days, without further details, but in a larger scope.
Event Frame
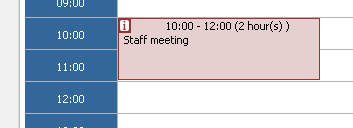
In all grid views events are displayed as a small, color frames. In Day view and Week view their size depends on their duration as well as the precision of the times on grid. In the Month view the size is fixed. You can see here some basic information, like the starting time of the event and usually shortened version of event's title. There is a small icon in the top left corner of the frame. When you hover mouse over it, details of the event will be displayed. When you click on this icon, then menu with actions will be displayed. There can be sometimes this icon on the event frame. It means that the event is repeatable.
Day View
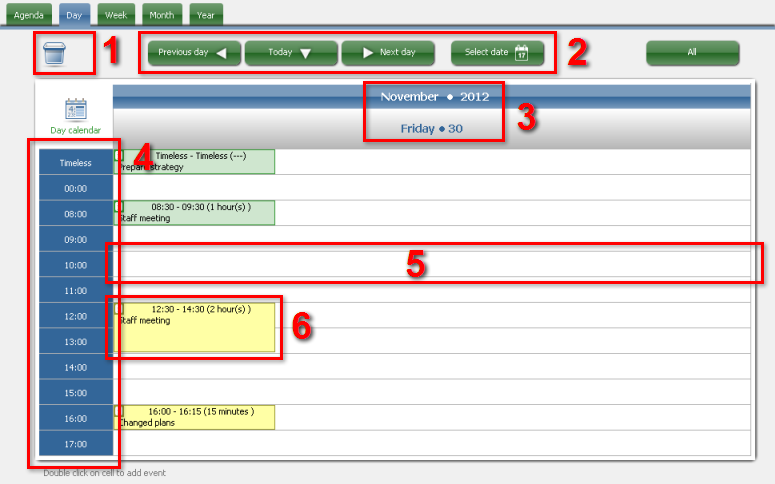
Day view displays all events of the selected day.
-
This space is used to delete events.
-
This panel helps you navigate through the dates, either by going through consecutive days ("Previous day" and "Next day") or by skipping right to the day of your interest ("Select date").
-
This header gives information, what day is displayed. In addition, signs of month and year serve as buttons to corresponding Month view and Year view.
-
This panel contain labels that inform about exact time the cells stand for.
-
A cell is a basic component of the day grid. Double click on it will start a creation of a new event.
-
This is an event. It is displayed in a form of event frame.
Week View
Week view is similar to Day view. There are, however, two differences - events from seven, not only one, consecutive days are displayed and the navigating panel is slightly different, as it allows also navigating with the week leaps.

-
An easy way to delete events.
-
Navigating panel helps you navigate through days nad weeks. You can move by one day ("Previous day", "Next day") or week ("Previous week","Next week"). There is always possibility to move right to the week of some other date ("Select date").
-
This time header informs about the month and year of the displayed week. There might be two such headers, when the week is at the edge of two months. The two labels - of month and year, both serve as buttons to Month view and Year view.
-
Day headers mark consecutive days of the week. All events in the column beneath this header are of the same day. It also serves as a button to a Day view. Time panel marks rows with times they refer to.
-
A single event, displayed as event frame.
-
A cell is also a basic component of the week grid. Double click on it will start the process of adding new event with starting date and time same as these of the cell.
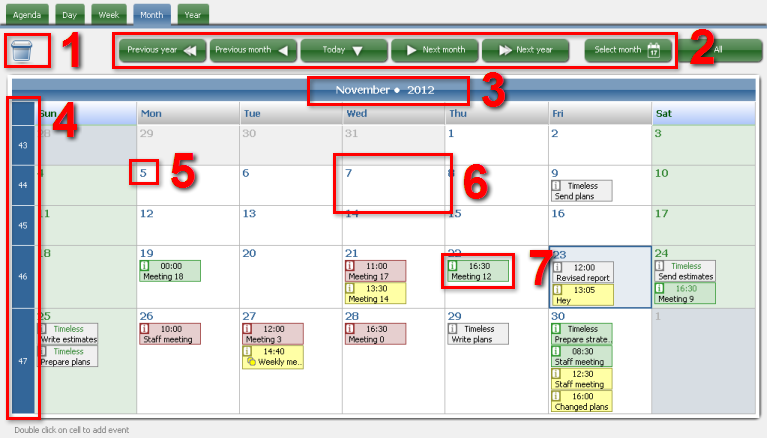
Month View
Month view displays events from selected month. It shows more events, but with fewer details.
-
This area is used to delete events.
-
Buttons in this panel serve as tools to navigate through months and years, either one after the other ("Previous mont", "Next month" and "Previous year","Next year") or directly to the month of interest ("Select month").
-
Header of the month. The sign of year serves also as a button redirecting to Year view.
-
Numbers on this panel refer to weeks. Each of these labels redirects to proper Week view.
-
A day label. Redirects to the Day view.
-
A day cell - basic component of Month view's grid. Double click on it will add a new event.
-
The events in this view are also represented by event frames, however all of them have the same size.
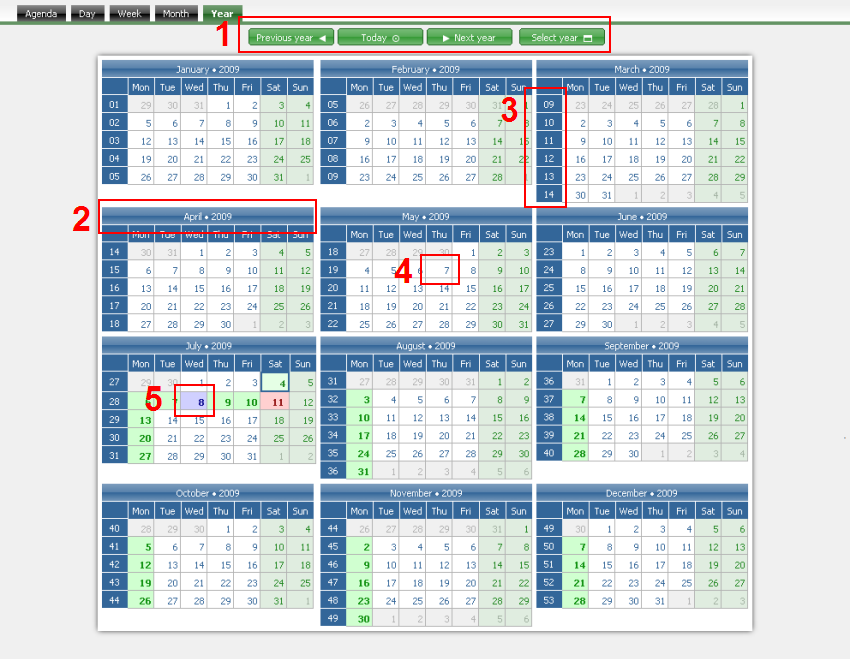
Year View
Year view is more of a general overview. It focuses on showing the days that have some events planned in the context of the whole year. You can use it also as navigating tool, as it has buttons which direct to all kinds of grid views.
-
Navigating panel, when you want to go through consecutive years ("Previous year" and "Next year" button) or just skip to another year ("Select year").
-
A month header. It works as a button redirecting to the Month view of the chosen month.
-
Headers of the weeks. Each of them, when pressed, redirects to Week view of the chosen week.
-
A cell of a day without any events. Still can be used to redirect to Day view of this day.
-
A cell of a day with some events planned (the font is bold and the background color is the same as the one of the first event of this day). It also redirects to Day view.
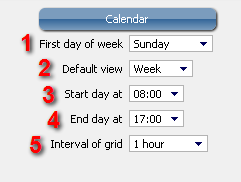
Options
There are a few options that can be changed here. You can access them by Menu -> My settings -> Control panel and then choosing Calendar. Click button "Save" on Action Bar to save chosen settings.
-
The day of the week you want to be displayed as the first one. This option is used not only in Week view and Month view, but also in Year view.
-
The view that will be displayed, when you access calendar.
-
The hour at which you start your day. The earlier hours will be displayed all in one row. This applies to Day view and Week view.
-
The ending hour of your day. The time after that till the end of the day will be seen in one row. This applies to Day view and Week view.
-
The precision, with which the grid will be displayed. The interval determines the duration that corresponds with each row. It is used in Day view and Week view.